OK, I have to be honest with you. Coming up with the perfect vegan aioli recipe has been the bain of my vegan existence!
You see, I have this little book in my kitchen that I write all my recipes in. If they are good, I use a pretty yellow highlighter to give them a big blog-worthy tick of approval. If they suck, I usually just make notes about what went wrong.
In the case of my vegan aioli recipe attempts, my notes progressed from a little “Nup, no good” in the bottom left corner, to a big all-caps “ANOTHER F$#KING FAIL!!!!” Yep, there’s a time and a place for eff-bombs and failing at vegan aioli for the 10th+ time is one of ’em.
Here’s the thing though, I know I could easily get it right with the use of more traditional oils used for making aioli – such as vegetable or canola oils. It’s just that I’m a bit of an oil snob – and when I explain why, you might be too…
Does the oil really matter?
In a nutshell, the process of extraction for most ‘vegetable’ oils – including canola, cottonseed, palm, safflower, soybean, corn and even sunflower oils – is horrific. The seeds or beans are often processed with petroleum solvents, acid, heated to extreme temperatures and treated with more chemicals. And THEN more chemicals again to improve the colour and neutralise the potent chemical smell of the final product.
Bottom line: vegetable oils are toxic. They’re not real food.
It’s easy to pick up a bottle of sunflower or vegetable oil with nice pictures of the original plant and think of it as a healthy oil. But don’t be fooled!
Oils such as nut oils (peanut, walnut, macadamia, etc.), as well as olive, coconut, flaxseed, sesame and avocado oils are extracted in a much cleaner, safer manner by which many of the nutrients from the original food are maintained. (FYI: My golden rule for oils is to always try to buy them organic).
So, you can see now why I refuse to use ‘vegetable’ oils to make vegan aioli. It does make things more difficult though, as the healthier oil choices don’t always emulsify as easily as the vegetable oils.
Back to the recipe.
This one was almost yet another page in my little book destined to be covered in F-words.
Here’s what happened: I roasted 6 cloves of garlic (unpeeled at 180ºC for 15 mins), then I added them with the salt, lemon juice, mustard, vinegar and aquafaba to the jug of my Magic Bullet. I then added 1/2 cup of olive oil (not extra virgin) and blended it. It didn’t work. So I added a whole avocado to try to rescue it into something ‘dippable’ at least, and then…
The bullet lived up to its name and made the magic happen. Within seconds it emulsified and turned into a beautiful, lush, thick, garlicky vegan aioli! It has a slight green colour, but doesn’t taste like avocado (the other flavours drown it out).
I’ve also tried this recipe using my immersion blender and it also worked a treat. A blender should also do the trick. The great thing about using avocado to make this aioli is that even if the emulsification doesn’t happen for you, you’ll still end up with something that’s at least the consistency of thick cream. So you can drizzle it on salads etc. and still even use it as a dipping sauce – it will still taste equally as good!
Aqua-whatty-what?
OK, so if you’re new to aquafaba, this is really everything you need to know about it:
- It’s the liquid from a can of chickpeas. You might wish to call it chickpea water or chickpea juice if you struggle with the word aquafaba
- It holds similar properties to egg so can be used for making things like vegan aioli, vegan meringues and vegan mousse
- If you plan to use it, you should make sure your chickpeas are in a BPA-free can. Nobody wants BPA-infused chickpea water in their cooking
- Not all aquafaba is equal! If you try this aioli recipe (or any recipe that uses aquafaba) and it fails, it could be the particular brand of chickpeas. Some will allow the emulsification/whipping processes to happen faster than others. Don’t give up till you’ve found one that works!
- It will keep in a jar in the fridge for up to 2 weeks after opening.
Don’t forget to keep your chickpeas and use them to make something like these super delicious chickpea koftas for dinner. You could even use this aioli for dipping them in… yummo 😉
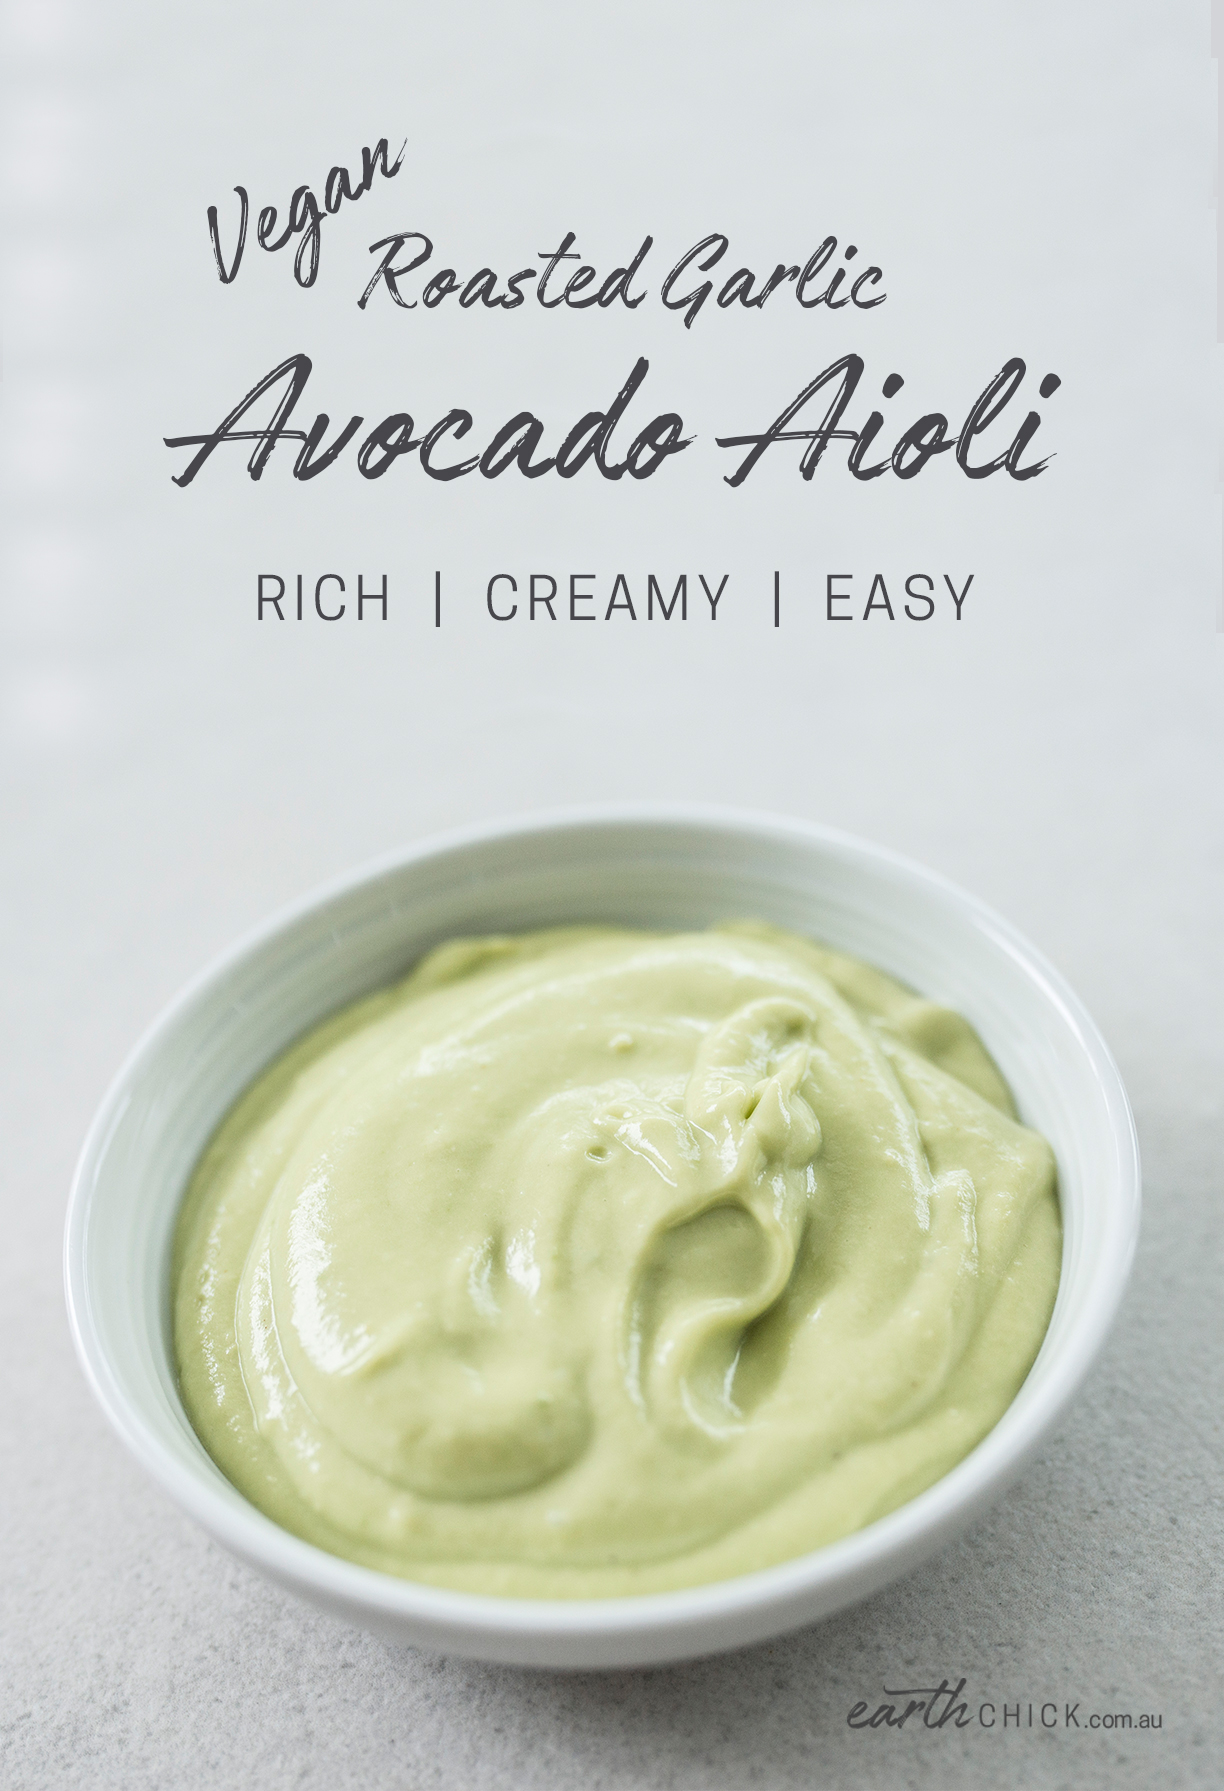
Rich, creamy, zesty and super easy to make!
- 3-6 cloves fresh garlic (unpeeled - use 6 if you want your aioli extra garlicky)
- 1/2 tsp fine salt
- 1 tbsp lemon juice
- 1/2 tsp dijon mustard
- 1 tsp apple cider vinegar
- 1/4 cup aquafaba
- 1/2 cup quality olive oil (not extra virgin)
- 1 ripe avocado
-
Preheat oven to 180ºC, then add the unpeeled garlic cloves to the oven on a tray and bake for 15 minutes until the cloves are softened (you may need to keep them in a little longer than 15 minutes, but careful not to let them burn if the garlic starts to ooze out of the skin).
-
Let the cloves cool for a few minutes then use a sharp knife to cut into each and squeeze the softened garlic out of the cloves into an immersion blender cup, bullet or blender.
-
Add all the other ingredients and blend or pulse until thick, creamy and emulsified (this should happen very quickly, if not see the recipe description above for some possible causes).
2 Comments
Submit a Comment


Sign up for a Freebie!
Join my mailing list and get a free guide to simple plant-based swaps
The consistency of this was perfect, and the flavor was good too!
Aw yay, I’m so happy you loved it! Thanks so much for the feedback 🙂 x